I will be participating in my very first craft show next weekend! I am so excited. I have been sewing and creating like a mad woman to get everything finished. Last night I finished the last thing on my 'must do' list, so now I can sit back and relax a little bit. Now I'm moving on to my 'if you have left over time, do this' list.
At the top of my second list was to make a craft show apron. I've always said that if I ever did a craft fair, I would make a cute functional apron for myself. I thought I would create a little tutorial for you all as well. When I say simple, I mean it was SUPER simple. After I cut out the fabric, it only took me about 30 minutes, and that was with a few interruptions. (Ahem...my sister kept calling me...)
Simple Craft Show Apron Tutorial:
Supplies:
Fabric of your choice (the paisley fabric is a heavier weight, which I thought made the apron a bit more sturdy)
Ribbon ( I chose ribbon in order to save time. I didn't feel like creating a tie to match...call me lazy...)
1 package bias tape (Again, a time saver. This would also be cute if you decided to make your own bias tape.)
Matching thread
Marking pen or pencil
Scissors

Step 1:
Cut the main back panel: 21"x 22"
Cut the pocket panel: 21"x 12"
Cut the waist band: 22" x 8"
Cut the ribbon: 2 pieces ~46" each (you can play with the length of the ribbon. I wanted it to wrap around, so if you do not want that, cut the ribbon shorter).
Step 2:
Iron and fold both the main panel and pocket panel in half, wrong sides together.
Edge stitch across the top folded edge of the pocket panel to give the pocket a nice finished look.
Place the pocket panel on top of the main panel, matching up all the raw edges.
Step 3:
Pin and sew a basting stitch along the 3 raw edges of the pocket panel to hold the pocket in place (You will be sewing on the bias tape later)
Step 4:
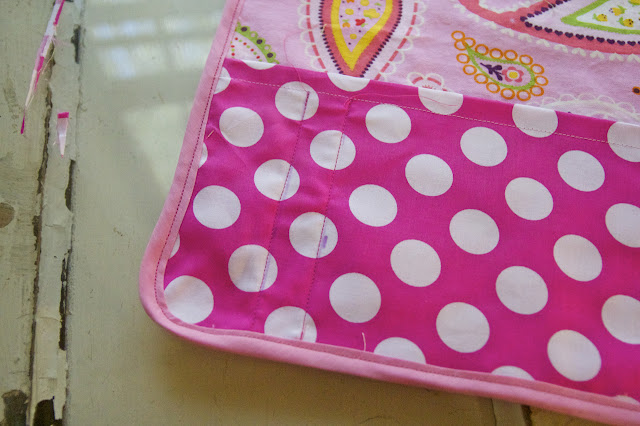
Draw with a fabric marking pen or pencil lines for your pockets. I chose to have two large pockets, with 2 smaller ones for pens and a pair of scissors. You can see where I drew my lines in the picture above.
Sew directly on top of the lines to create your pockets, backstitching at each end.Step 5:
Pin your bias tape around all 3 raw edges, including the back panel. For me, the more pins the better.
Edge stitch along the bias tape, backstitching at each end, making sure to keep the fabric in between the bias tape. Go slowly around the corners, this can be tricky!
This will enclose and finish off all the raw edges.
Set aside.
Step 6:
Fold the waistband in half wrong sides together and press.
Open waistband, fold each short raw edge about a 1/2" toward the wrong side and press.
Now fold each long raw edge about 1" toward the wrong side and press. It should look similar to the picture above.
Step 7:
Place one of the ends of your ribbon close to the ironed crease in your waistband. Fold the waistband over and pin in place. Do this to the other side with the other piece of ribbon also.
Step 8:
Slide the top of the main panel in between the folded waistband about an inch. Re-fold waistband and pin through all 3 layers (waistband, main panel, waistband).
Sew around all 3 open edges, attaching the ribbon and main panel to the waistband.
Step 9:
I don't have this pictured, but run a flame along the raw edges of the ribbon to seal the ribbon to prevent fraying.
That's it! You now have yourself a super cute, super simple craft show apron!!


too cute!!!
ReplyDeleteSo cute. Pinning it :)
ReplyDeleteLOVE how easy this tutorial is...pinned & attempting this week... it'll be perfect for my first street fair in April, yay! thanks!!
ReplyDeleteMerci beaucoup !!
ReplyDeleteThank you very much! I'm a primary teacher in France and it's going to be really useful to me!! :-)